
OK, I have an obsession I know! But this is my second to last slow cooked roast blog. Maybe. I love them a lot! This one also involves the slow cooker!
So! Pork shoulder. It’s a hard working bit of meat. Free ranged pigs in particular have big shoulders. They are forever rooting around finding tasty things to eat and digging holes, this builds the muscles and it is muscle that you eat. It’s dense and it has fat running through it, which makes for good slow cooking meat.
I’m not going to lie, I was beyond sceptical about this method of cooking pork that would also give me crackling. How can pork sit in a slow cooker without any fluid for 8 hours still give me crackling?! That’s crazy. But my friend Adam told me it could be done. And if Adam can do it then so can I! Also, I love crackling and I love one pot cooking.
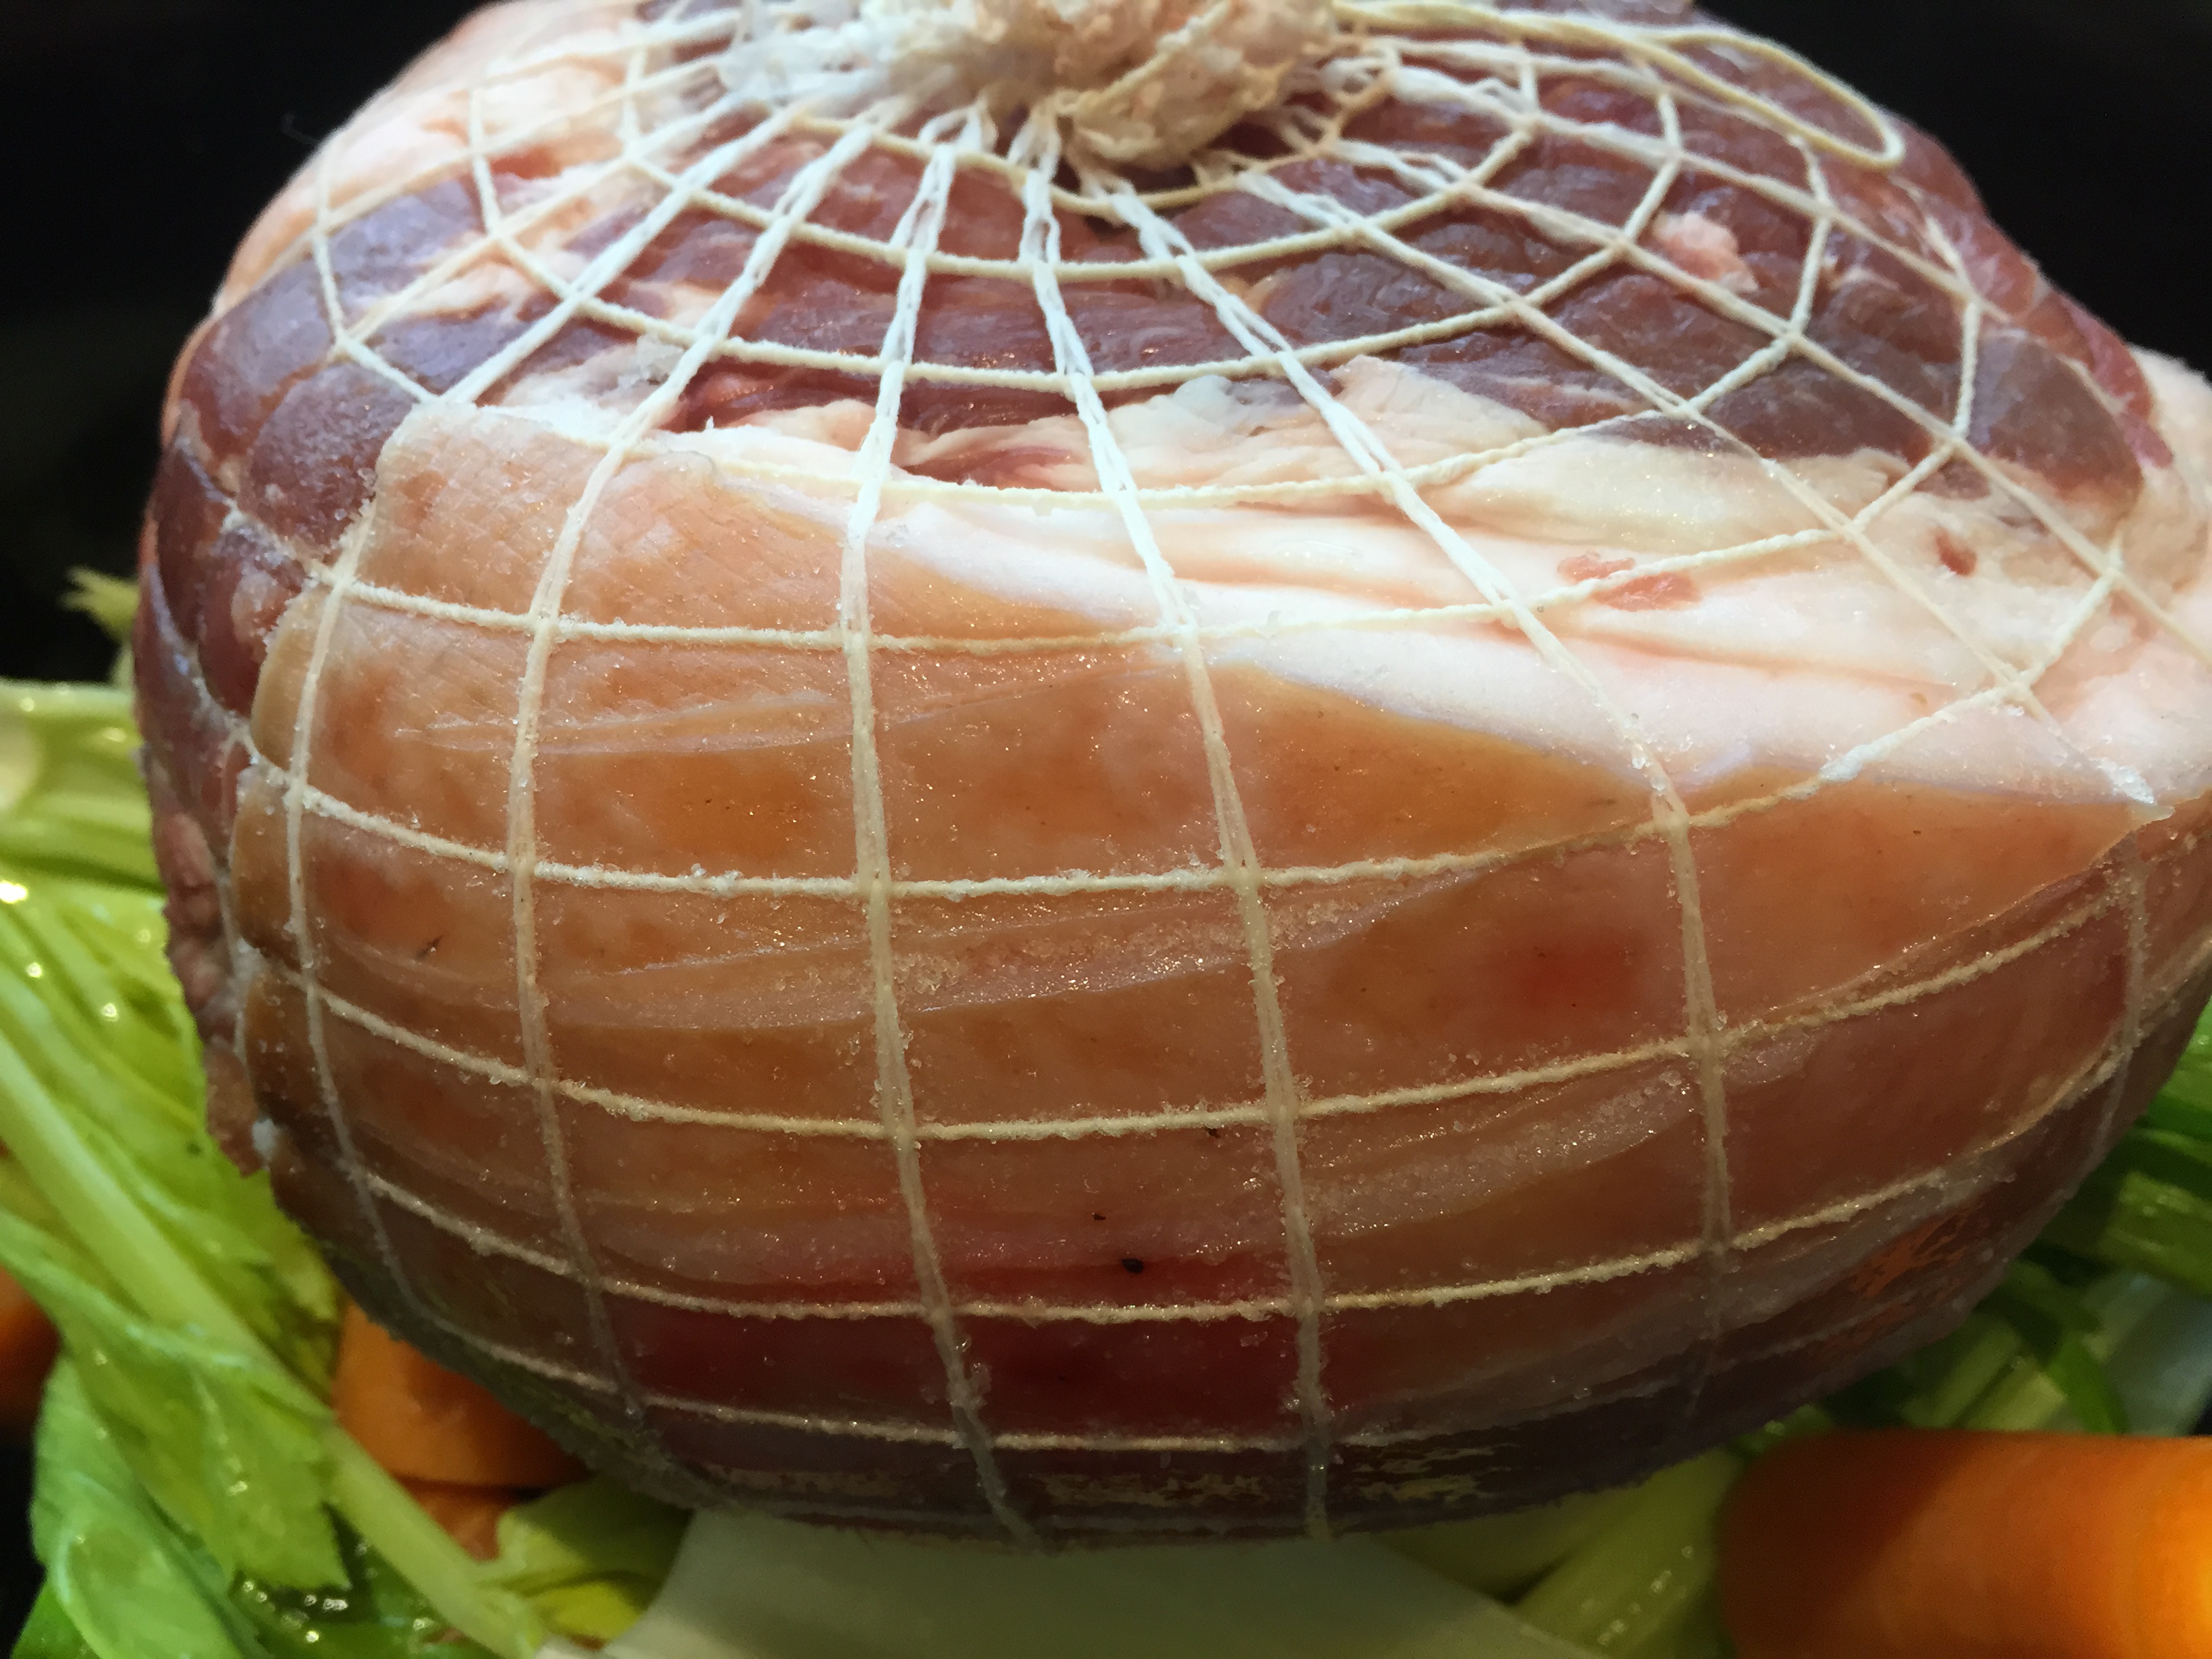
My rolled roast sitting on my trusty trio of veg!
I’m using a pork shoulder prepared by our butcher. It’s been boned and rolled and as a handy bonus the skin is scored. To prepare the crackling I used the same method as the Asian hock. I poured boiling water only on the skin, rubbed it down with salt, and left it in the fridge overnight covered with some paper towel. My mum has tried to explain to me another method that involves lemon and salt and doesn’t take all night. I’m not really clear on the details but I’ll definitely get her to show me how it works and I’ll give that a try next time.
The next morning I pulled out my pork shoulder, sprayed it with some oil, and placed it in the slow cooker on a bed of my 3 favourite vegetables. Carrot, onion, and celery. I turned the slow cooker on low and left it for roughly 10 hours.

Yup, that looks unappetising.
The very first time I used the slow cooker for pork Neil was ready to call out for pizza because he was not convinced it would work. To be fair, it does not look good at the 10 hour mark. Skin looks a bit gelatinous and the meat looks grey. But you have to trust it and push on. A half hour before you pull your roast out of the slow cooker crank the oven as high as it’ll go and when its’s reached the right temperature grab your roast and place it into an oven safe container and put it in the oven. Once I put my roast in I try to remember to turn the oven back down to 220C and I leave the roast in there for about a half hour. And then you cross all your fingers and toes and hope you get crackling!
With this roast, I did get crackling but I was worried about how much crackling I was getting and how long the roast had been in the hot oven. I think my problem was the orientation of the skin. Instead of being on top of the meat it was around the meat, it might not be a problem but in my head that was the problem I was having. It might also be that my oven is literally falling apart. (I’m using cardboard to wedge the door closed. I had contemplated using Neil’s 5 foot fencing stick or crowbar as he likes to call it to prop the oven door closed until Neil’s dad came up with a much much better idea J )
But back to the crackling! At the half hour mark, I had crackling but not all of it had crackled and I was worried about my meat drying out, it had at that point been cooking for ten and a half hours after all. I pulled the roast out of the oven and my plan was to separate the meat from crackling and put the crackling back into the oven so that the meat could rest. In theory this was a great plan, in practice not so.
I have no pictures of this part of the process so you’re going to have to really use your imagination.
I have previously pulled crackling from pork and put it back in the oven with great success. Not so this time. In the past it had been from whole cuts of meat, not meat that was being kept together with netting. My problem with this roast is that my half crackling had stuck to my netting. Instead of being able to pull the crackling off as a whole sheet it was coming off in bits and pieces and flat out sticking to the netting. The whole process got a lot messy and to add to my mess, my pork was so tender that it was falling apart in giant chunks. In the end, I did get my crackling off and on to a tray to go back into the oven and it crisped up beautifully. Next time though, once I get the meat out of the slow cooker I’ll remove the netting before it goes into the oven just in case I have to take the meat out and let the crackling crisp up a little more.
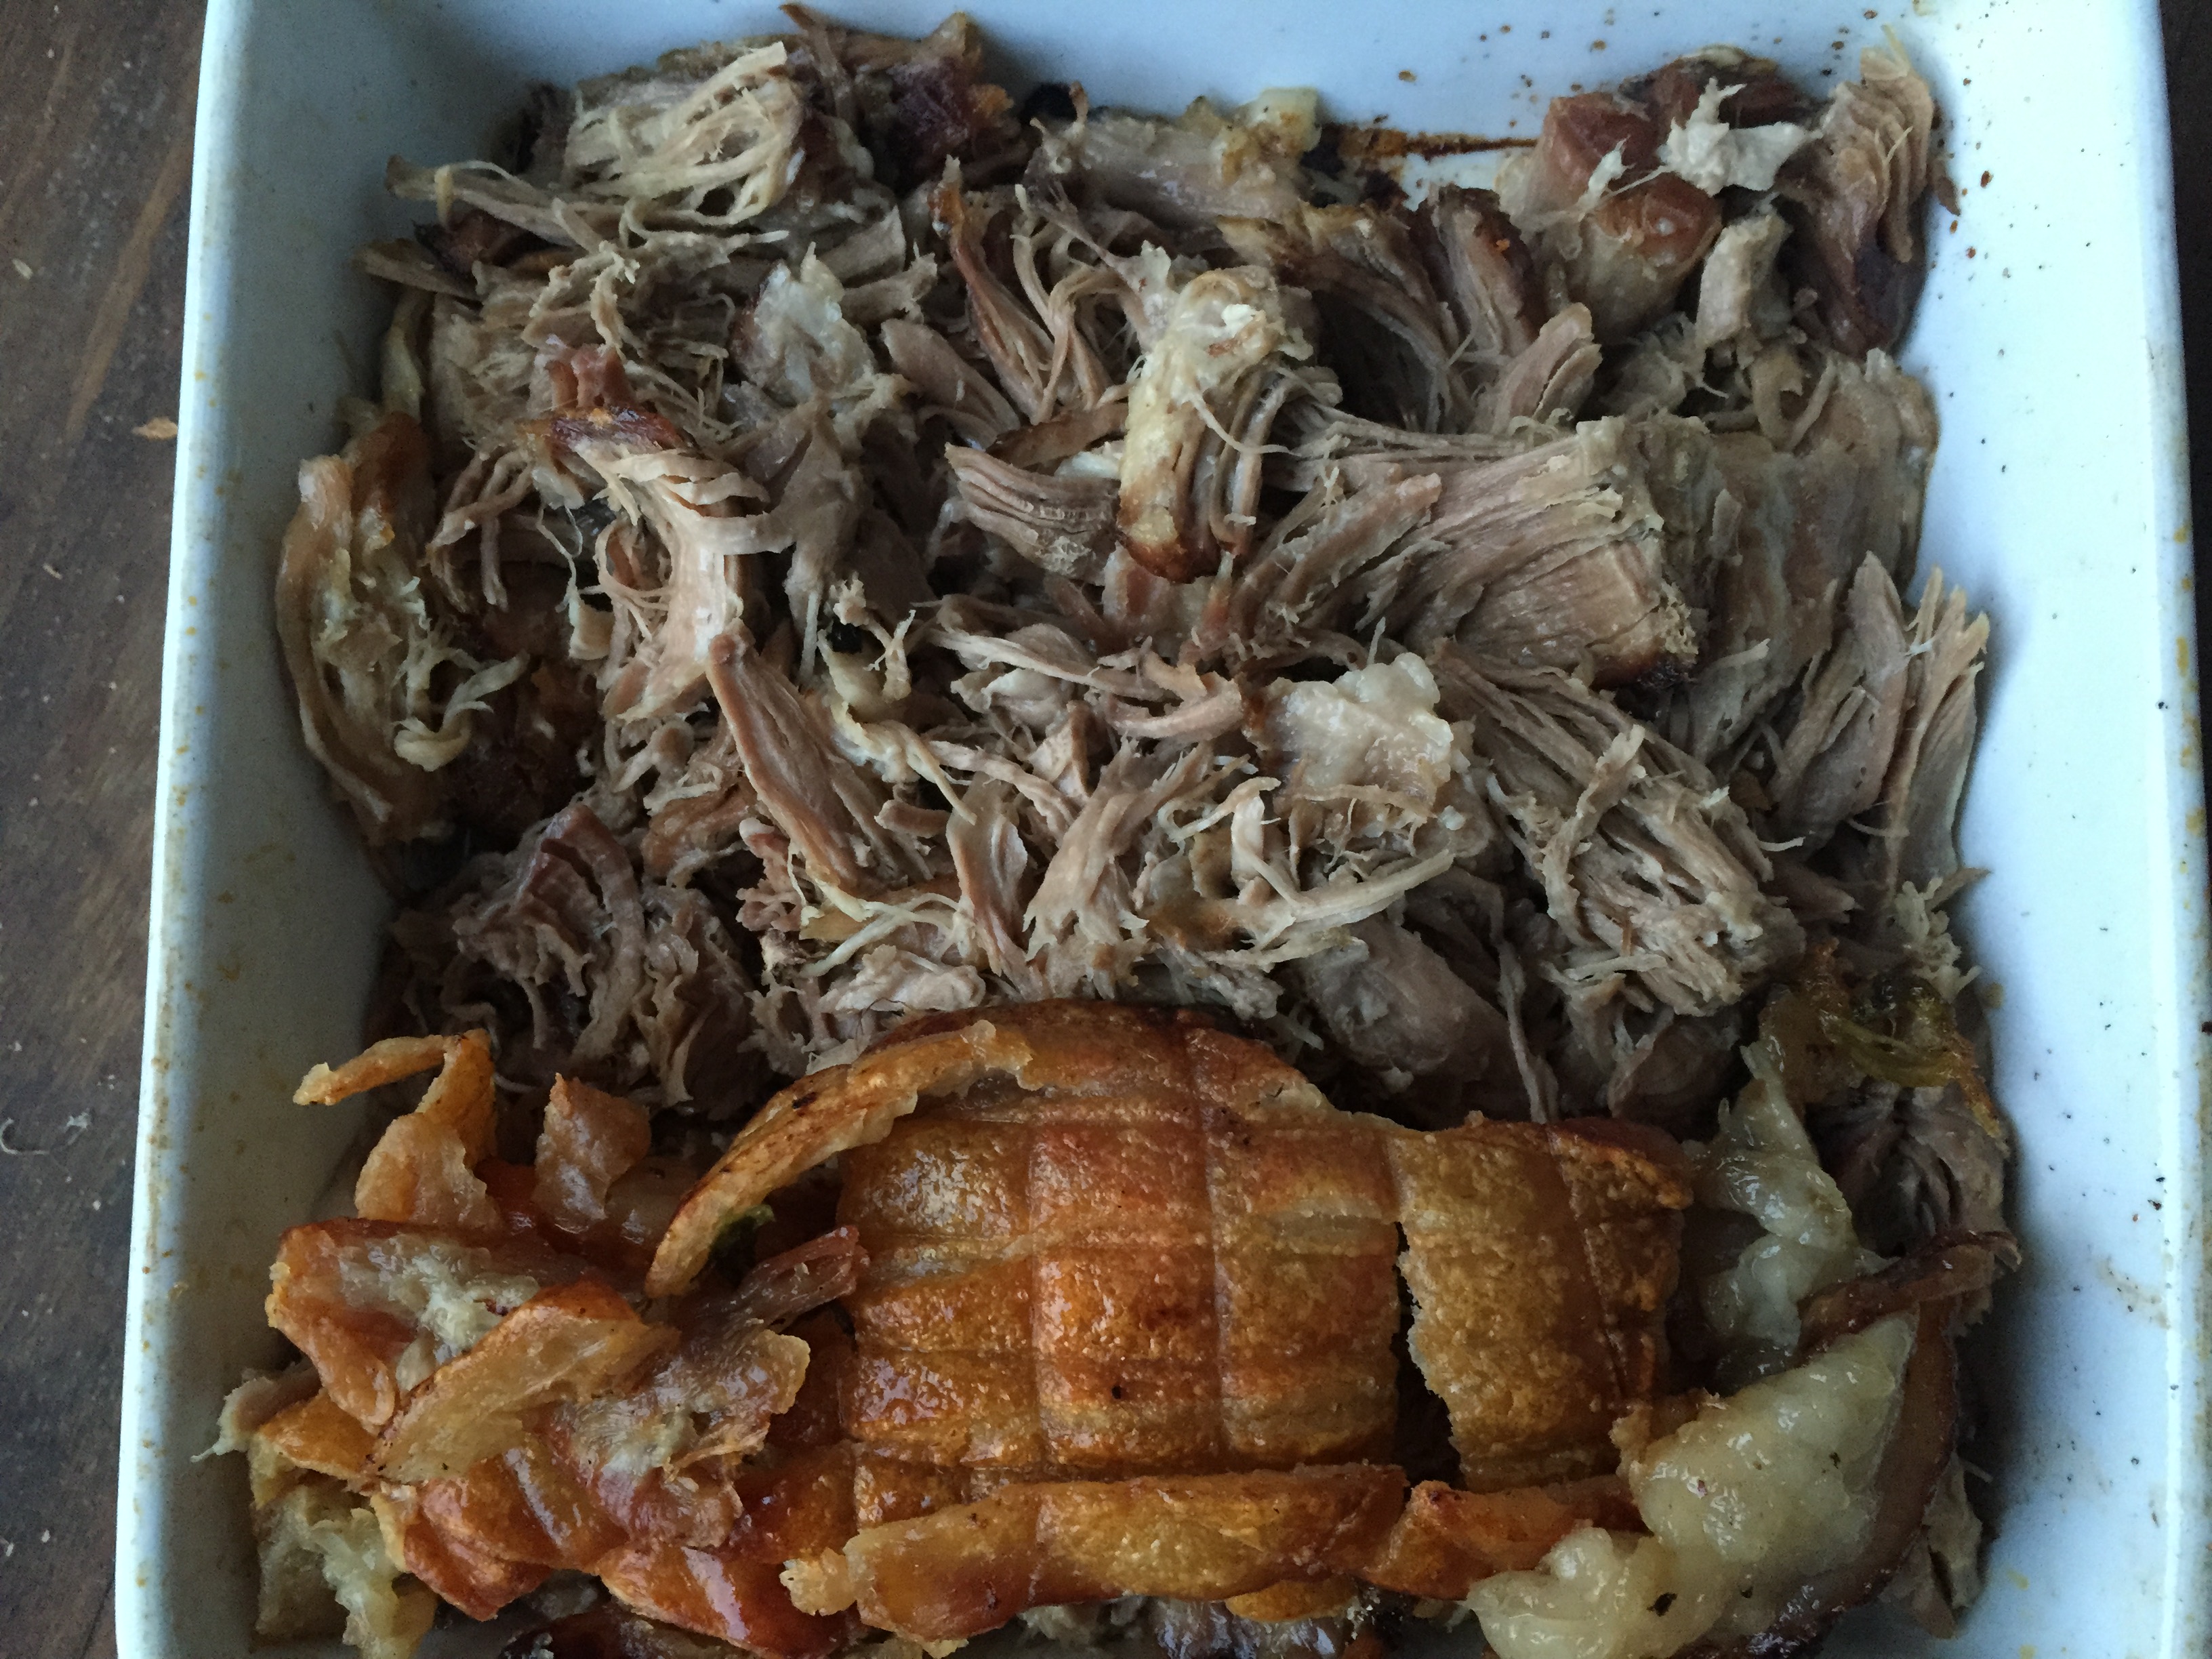
Crackling and pork!
Even though this was messier than I had wanted, it turned out really well. The meat was tender enough that instead of carving the meat, Neil pulled it apart with two forks. I did get crackling and it was beautiful. I also did a tray of roast veggies to go with dinner. It fed 5 adults with more than enough left over for a couple more people and we had it as a celebratory dinner for my sister’s engagement! Yay for Sally and Tim!
Slow Cooked Pork Shoulder Roast
Feeds at least 6 adults with big appetites.
Ingredients:
2kg boned out and rolled pork shoulder
2 carrots in large chunks
2 sticks of celery in large chunks
1 onion quartered
Method:
- Pour boiling hot water over the skin only of the roast, rub in salt, cover, and refrigerate overnight.
- Next morning, place your vegetables in the bottom of your slow cooker bowl with your pork sitting on top. Turn your slow cooker on low and leave for 8-10 hours.
- Half an hour before you’re ready to take your pork out of the slow cooker turn your oven to its highest heat setting.
- When the oven is ready, remove your pork from the slow cooker and place it into an oven safe dish, spray the skin with some oil, and place the dish into the hot oven. Turn the temperature down to 220C.
- Check your roast after 30 mins. If the crackling is done remove the roast from the oven, cover it in alfoil and let it rest for 30 mins. If the crackling is not done, take the roast out of the oven and separate the meat from the crackling, place the crackling back on a tray and put it back into the oven until the crackling has crisped up. Cover the meat and rest for 30 minutes.
- Use the pan juices from the slow cooker to make gravy. Serve pork with roast veggies and gravy!
